Auto Installation
Installation Script
This script automatically performs all the steps required for Gensyn node installation. Just download and run it.
Or download directly on your server with:
wget https://gensyn.org/gensyn_install.sh
Installation Steps
- 1
Download the script
Download the script
gensyn_install.shwget https://gensyn.org/gensyn_install.sh
- 2
Give execution permissions:
Give execution permissions:
chmod +x gensyn_install.sh
- 3
Install Screen
Install screen to manage terminal sessions:
sudo apt install screen -y
- 4
Create Screen Session
Create a screen session to run the installation:
screen -S gensynrlswarm
- 5
Run the script:
Run the script:
./gensyn_install.sh
- 6
Follow the on-screen prompts
Follow the on-screen prompts
Tip: You can detach from the screen session with CTRL+A+D and reattach later with
screen -r gensynrlswarm
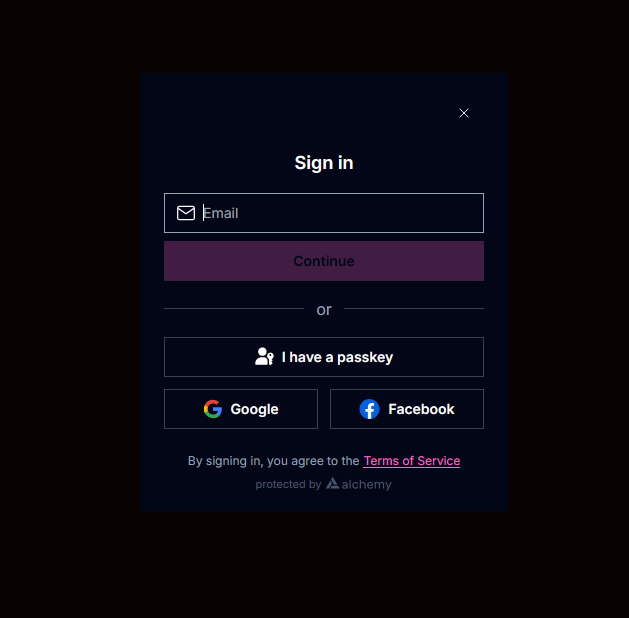
Login With Email / Google
During installation, you'll need to log in to HuggingFace. You can use either email or Google authentication.
Warning: If you don't receive an email or encounter login issues, press CTRL+A+D to exit the screen, complete the NGROK setup steps, and then return to step 4 of the installation process.

Enter Y and Press Enter
The installation script will ask for confirmations. Type 'Y' and press Enter to continue.
Paste Your HuggingFace Key
When prompted, paste your HuggingFace API key that you created earlier.

Save Node Name and Node ID
Important: Make sure to save your Node Name and Node ID displayed during installation. You'll need these later to track your node's performance.
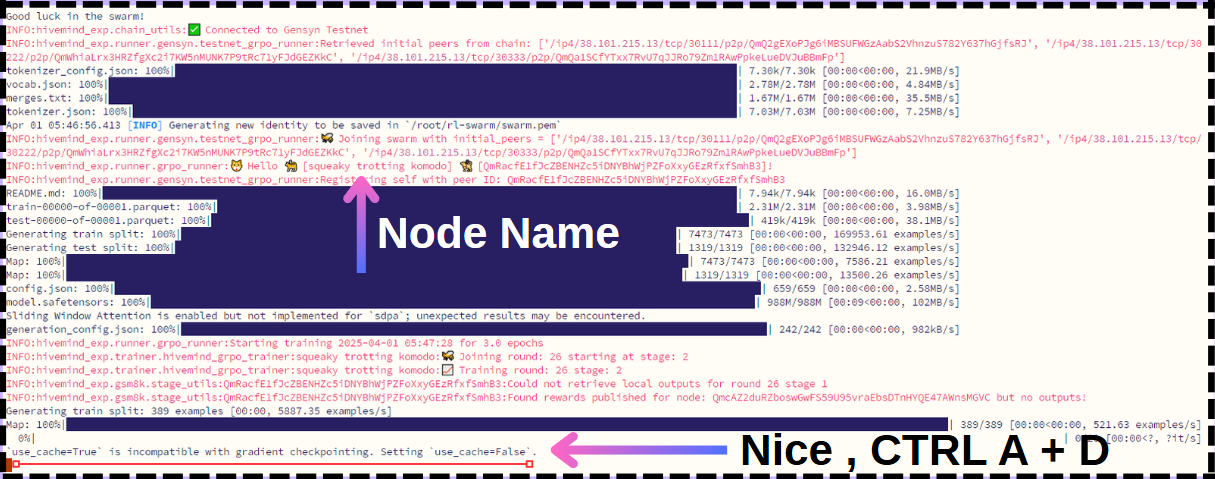
After installation completes, press CTRL+A+D to detach from the screen session.
Save .pem File
You need to save the swarm.pem file located at: /root/rl-swarm/swarm.pem

Important: This file contains important security credentials for your node. Make sure to save it securely.
Tip: You can exit any screen session with CTRL+A+D and return to it later. Use screen -r gensynrlswarm to return to the Gensyn node screen or screen -r ngrok to return to the NGROK screen.
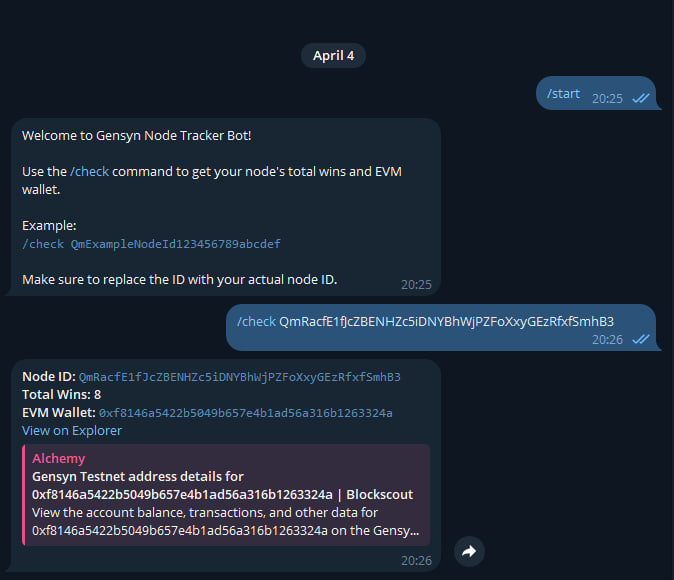
Check Your Node Status with Telegram Bot
You can check your node's wins and status using the Gensyn Telegram bot. Send /check YOUR_NODE_ID to the bot.
NGROK Setup (If Needed)
If you encounter login issues, you may need to set up NGROK to create a secure tunnel.
1. Create NGROK Screen Session
screen -S ngrok
2. Run NGROK
ngrok http 3000
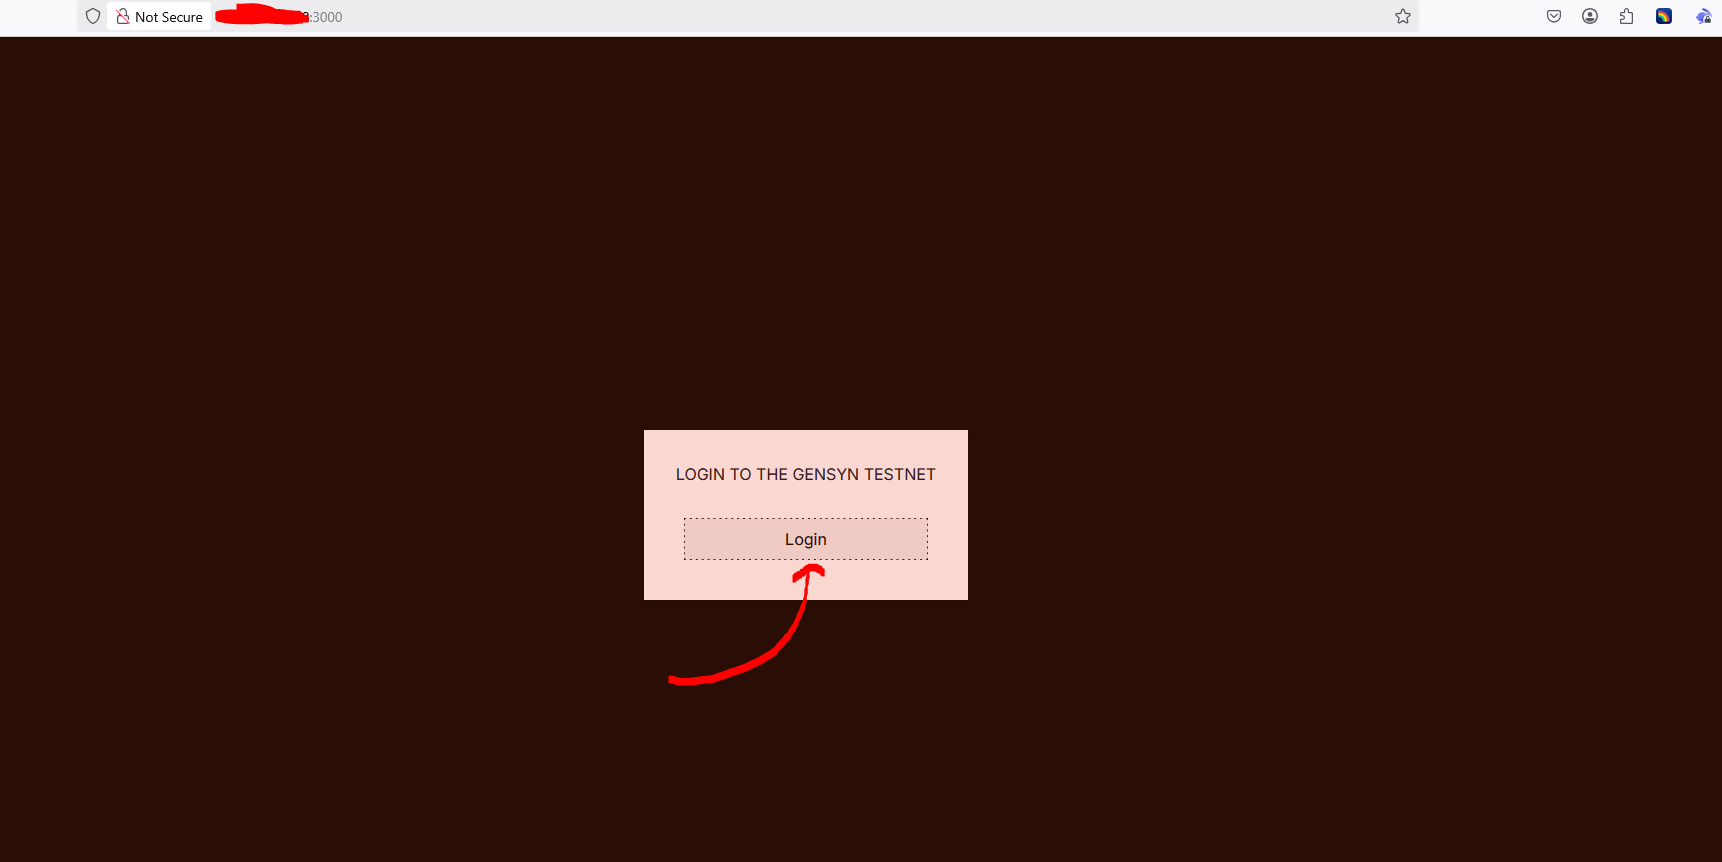
3. Copy NGROK URL
Copy the forwarding URL (https://xxxx-xx-xx-xxx-xxx.ngrok-free.app) and use it in your browser.
Tip: Tip: You can exit the screen session with CTRL+A+D and return to it later with screen -r ngrok. Similarly, you can return to the Gensyn node screen with screen -r gensynrlswarm.
This script automatically performs all the steps required for Gensyn node installation. The script does the following:
- Performs system updates
- Installs required packages
- Installs NPM, Python, Yarn and Git
- Clones the RL-Swarm repo
- Runs the SWARM
- Sets up HuggingFace token
- Saves Node ID and Node Name for tracking
Note: If you encounter issues with Google login, you may need to set up NGROK. The script will ask if you want to install it. Alternatively, you can follow the NGROK Setup instructions on the home page.
© 2025 Gensyn Node Installation Guide. All rights reserved.
Powered by FurkanL0 / RPCdot.com