System Requirements
| CPU | arm64 / amd64 |
| RAM | 16++ GB (20++ recommended) |
| GPU CUDA | RTX 3090, RTX 4090, A100, H100 |
| Python | Python >= 3.10 |
| Storage | x+ GB SSD |
| Network | 100 Mbps (1 Gbps+ recommended) |
Installation Guide
1Server Update
sudo apt update -y && sudo apt upgrade -y
2Install Packages
sudo apt install htop ca-certificates zlib1g-dev libncurses5-dev libgdbm-dev libnss3-dev tmux iptables curl nvme-cli git wget make jq libleveldb-dev build-essential pkg-config ncdu tar clang bsdmainutils lsb-release libssl-dev libreadline-dev libffi-dev jq gcc screen file unzip lz4 -y
3NPM Installation
curl -fsSL https://raw.githubusercontent.com/nvm-sh/nvm/v0.39.4/install.sh | bash source ~/.bashrc
nvm install --lts
4Python / Yarn / Git Installation
sudo apt update && sudo apt install -y python3 python3-venv python3-pip git yarn && curl -sS https://dl.yarnpkg.com/debian/pubkey.gpg | sudo apt-key add - && echo "deb https://dl.yarnpkg.com/debian/ stable main" | sudo tee /etc/apt/sources.list.d/yarn.list && sudo apt update && sudo apt install -y yarn
5RL-Swarm Repo Installation
git clone https://github.com/gensyn-ai/rl-swarm.git && cd rl-swarm
cd modal-login
yarn upgrade
yarn add next@latest
yarn add viem@latest
cd ..
6Create Screen
screen -S gensynrlswarm
7Run SWARM
python3 -m venv .venv && source .venv/bin/activate && ./run_rl_swarm.sh
Login Steps
1. Confirm Installation (Y, Enter)
When prompted, type 'Y' and press Enter to confirm the installation.
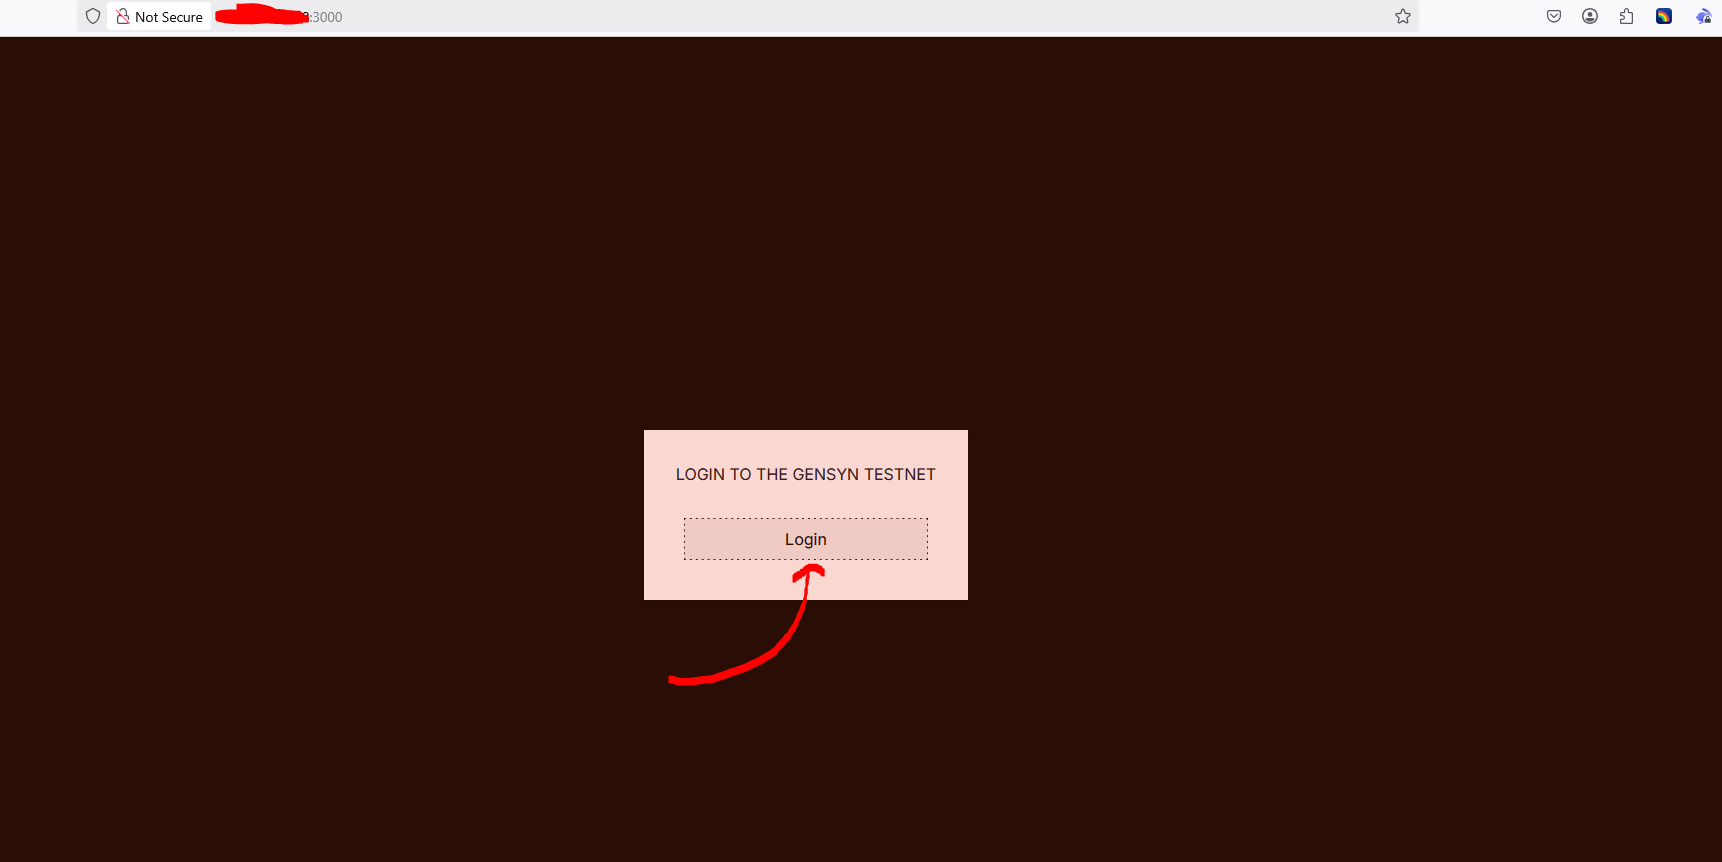
2. Visit the Link in Your Browser
You'll be prompted to visit a link in your browser to authenticate.
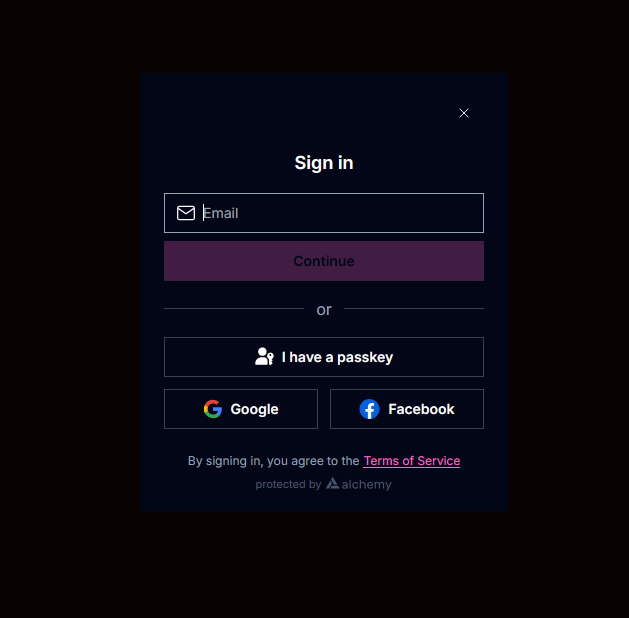
3. Login with Email or Google
Choose your preferred login method (Email, Google, etc.) on the HuggingFace login page.
Warning: Warning: If you don't receive an email or encounter login issues, press CTRL+A+D to exit the screen, complete the NGROK setup steps, and then return to step 4 of the installation process.

4. Confirm Again (Y, Enter)
After successful login, you'll need to confirm again by typing 'Y' and pressing Enter.

5. Paste Your HuggingFace Key
When prompted, paste your HuggingFace API key that you created earlier.

HuggingFace Setup

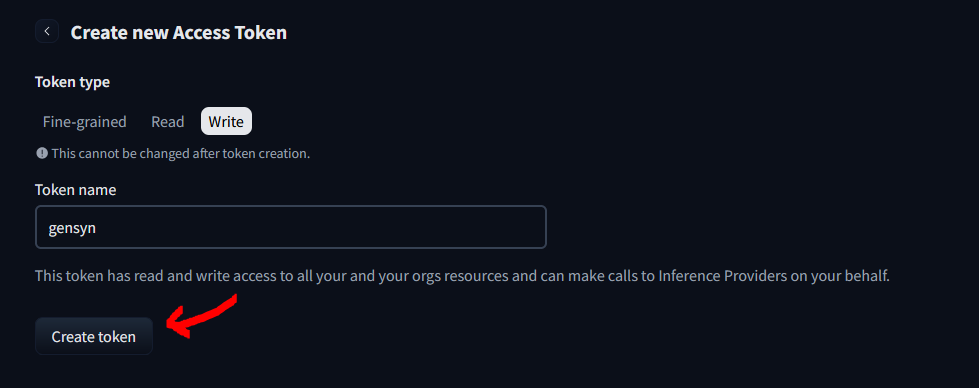
2. Create Access Token with Write Permissions
Go to your account settings, 'Access Tokens' section and create a new token with 'Write' permissions.
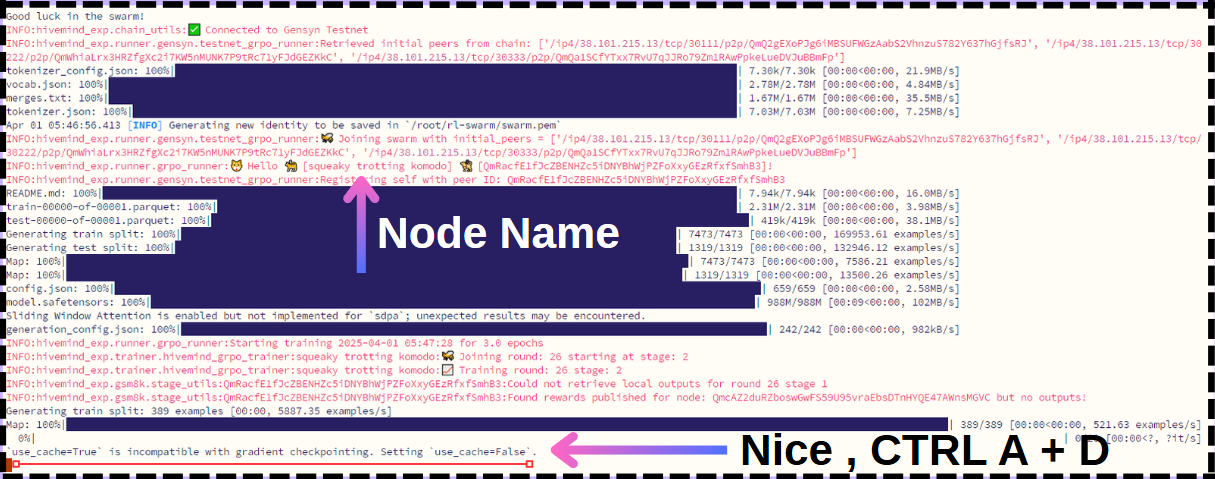
Save Your Node ID
During the installation process, your Node ID and Node Name will be displayed. It's crucial to save this information as you'll need it to track your node's performance and wins.
Where to Find Your Node ID
Your Node ID will be displayed in the terminal during the installation process. Look for a line that shows "Node ID" or "Node Name".
Important: Important: Make sure to copy and save your Node ID in a secure location. You'll need it to check your node's status and wins using the Telegram bot.
Save .pem File
After setting up your node, you need to save the swarm.pem file. This file contains important security credentials for your node.
PEM File Location
The PEM file is located at: /root/rl-swarm/swarm.pem /root/rl-swarm/swarm.pem
cat /root/rl-swarm/swarm.pem

Important: Important: Make sure to save this file securely. You may need it for future reference or node recovery.
NGROK Setup
Install NGROK
For x86 Servers:
wget https://bin.equinox.io/c/bNyj1mQVY4c/ngrok-v3-stable-linux-amd64.tgz && tar -xvzf ngrok-v3-stable-linux-amd64.tgz && sudo mv ngrok /usr/local/bin/
For Arm64 Servers:
wget https://bin.equinox.io/c/bNyj1mQVY4c/ngrok-v3-stable-linux-arm.tgz && tar -xvzf ngrok-v3-stable-linux-arm.tgz && sudo mv ngrok /usr/local/bin/
Create NGROK Screen Session
screen -S ngrok
Run NGROK
ngrok http 3000
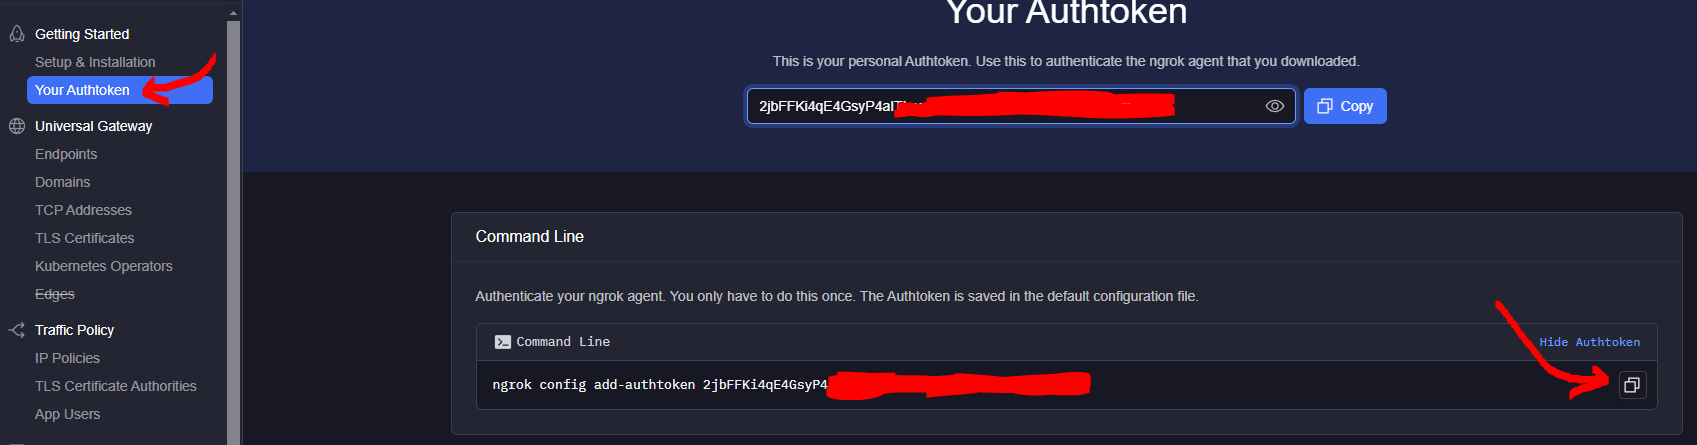
NGROK Configuration
NGROK Screen Session
NGROK Running
Copy NGROK URL
Copy the forwarding URL (https://xxxx-xx-xx-xxx-xxx.ngrok-free.app) and use it in your browser.
Tip: Tip: You can exit the screen session with CTRL+A+D and return to it later with screen -r ngrok. Similarly, you can return to the Gensyn node screen with screen -r gensynrlswarm.
Telegram Bot for Node Tracking
Use the Gensyn Telegram bot to check your node's performance
How to Use the Bot
- Make sure to save your Node ID during installation
- Send /check YOUR_NODE_ID to the bot
- The bot will display your total wins and EVM wallet information
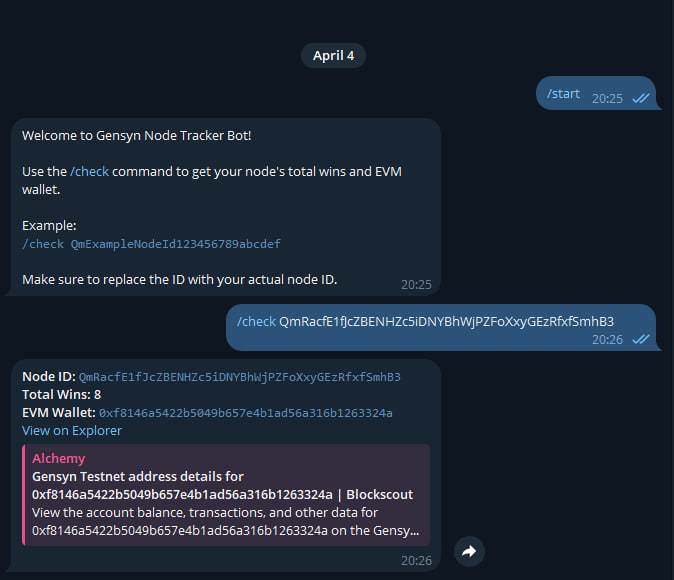
Important: Important: Make sure to replace the example Node ID with your actual Node ID that was displayed during installation.